Hemp milk is becoming an increasingly popular alternative to dairy and other plant-based milks. With its rich nutritional profile and creamy texture, it’s a great addition to any diet. But how exactly is hemp milk produced? From the planting of hemp seeds to the packaging of the final product, the process is fascinating and intricate. Let’s take a journey through the production of hemp milk, from seed to shelf.
Introduction to Hemp Milk Production
Hemp milk is produced from the seeds of the hemp plant (Cannabis sativa). Unlike marijuana, hemp contains only trace amounts of THC, the psychoactive compound, making it a safe and legal option for consumption. The production process of hemp milk involves several stages, each ensuring the quality and safety of the final product.
Cultivating Hemp Seeds
Cultivating hemp seeds involves several critical steps to ensure a successful and healthy crop. Here’s a detailed guide on how to cultivate hemp seeds:
Step 1: Understanding Legal Requirements
- Research Local Laws: Before you start, ensure that you are aware of and comply with local and national regulations regarding hemp cultivation. Hemp laws can vary significantly depending on your location.
- Obtain Necessary Licenses: Most regions require licenses or permits to grow hemp. Ensure you have all the required paperwork.
Step 2: Choosing the Right Seeds
- Select the Right Variety: Hemp comes in various strains tailored for different uses such as fiber, seeds, or CBD production. Choose a variety that suits your purpose.
- Source Quality Seeds: Purchase seeds from reputable suppliers to ensure high germination rates and genetic purity.
Step 3: Preparing the Soil
- Soil Testing: Conduct a soil test to determine pH levels and nutrient content. Hemp thrives in well-drained loamy soil with a pH between 6.0 and 7.5.
- Soil Preparation: Prepare the soil by plowing and adding necessary amendments based on your soil test results. Hemp requires a good balance of nitrogen, phosphorus, and potassium.
Step 4: Planting
- Timing: Plant hemp seeds after the last frost date in your area when soil temperatures reach at least 50°F (10°C).
- Seeding Rate: For grain production, sow seeds at a rate of 30-40 pounds per acre. For CBD or fiber, adjust accordingly.
- Planting Depth: Sow seeds about 0.5 to 1 inch deep in the soil.
Step 5: Watering and Irrigation
- Initial Watering: Water the seeds thoroughly after planting to ensure good soil contact and germination.
- Regular Irrigation: Hemp requires consistent moisture, especially during the early growth stages. Avoid waterlogging as hemp roots need good aeration.
Step 6: Nutrient Management
- Fertilization: Apply fertilizers based on soil test recommendations. Hemp typically requires higher nitrogen levels but balanced nutrients are crucial.
- Organic Amendments: Consider using compost or other organic matter to enrich the soil.
Step 7: Weed and Pest Control
- Weed Management: Hemp can outcompete many weeds due to its rapid growth, but initial weed control is essential. Use mechanical weeding or approved herbicides.
- Pest and Disease Control: Monitor for common pests like aphids and caterpillars. Use integrated pest management (IPM) strategies to manage pest populations.
Step 8: Monitoring and Maintenance
- Growth Monitoring: Regularly check the growth of your hemp plants. Look for signs of nutrient deficiencies, pests, or diseases.
- Pruning and Training: For CBD production, pruning can help enhance flower production. Use techniques like topping or low-stress training (LST) to optimize growth.
Step 9: Harvesting
- Timing: Harvest hemp seeds when they reach full maturity. This typically occurs about 100-120 days after planting.
- Harvesting Method: For seed production, use a combine harvester. Ensure seeds are dried properly to avoid mold and spoilage.
Step 10: Post-Harvest Processing
- Drying: Dry hemp seeds to a moisture content of around 8-10% to prevent mold.
- Storage: Store dried seeds in a cool, dry place. Use airtight containers to protect against pests and humidity.
Tips for Success
- Rotation: Rotate hemp with other crops to maintain soil health and reduce pest and disease build-up.
- Local Support: Join local hemp farming associations or groups to stay updated on best practices and regulatory changes.
- Sustainability: Adopt sustainable farming practices to improve soil health and ensure long-term productivity.
By following these steps, you can cultivate hemp seeds successfully, whether for industrial, nutritional, or medicinal purposes.
Harvesting Hemp Seeds
Harvesting hemp seeds is a crucial step in the hemp farming process, as it directly impacts the quality and yield of the seeds. Here’s a detailed guide on how to effectively harvest hemp seeds:
-
Understanding the Right Time to Harvest
Hemp seeds are ready for harvest when the plants reach full maturity, typically 4-6 weeks after flowering. Look for the following signs to determine the right time:
- Color Change: The seeds change from green to brown or grey.
- Seed Bracts Opening: The bracts (seed coverings) start to open, exposing the seeds.
- Hardness: The seeds should be hard to the touch and not easily squishable.
-
Pre-Harvest Preparation

Field Inspection
- Check for Maturity: Regularly inspect the fields for uniform maturity.
- Pest and Disease Management: Ensure the crop is free from pests and diseases to prevent any damage during harvesting.
Equipment Preparation
- Clean Equipment: Ensure all harvesting equipment is clean to prevent contamination.
- Set Up Machinery: Adjust the combine harvester settings according to the manufacturer's guidelines for hemp seed harvesting.
- Harvesting Process
Manual Harvesting
For small-scale operations, manual harvesting is an option:
- Cutting Plants: Use sickles or pruners to cut the hemp plants close to the base.
- Bundling: Bundle the cut plants and hang them upside down in a dry, well-ventilated area to dry.
Mechanical Harvesting
For large-scale operations, mechanical harvesting is more efficient:
- Combine Harvester: Use a combine harvester specifically adjusted for hemp seeds to cut, thresh, and separate the seeds from the plants in one pass.
- Threshing: Ensure proper threshing to separate seeds from the plant material.
-
Post-Harvest Handling
Drying
- Immediate Drying: Dry the harvested seeds immediately to prevent mold and spoilage.
- Drying Conditions: Maintain a temperature of 35-40°C (95-104°F) with good air circulation.
- Drying Time: Seeds usually take 3-5 days to dry thoroughly.
Cleaning
- Seed Cleaning Equipment: Use seed cleaning equipment to remove any plant debris, dust, and immature seeds.
- Screening and Winnowing: Employ screening and winnowing techniques to ensure only high-quality seeds are retained.
Storage
- Cool, Dry Storage: Store the cleaned and dried seeds in a cool, dry place.
- Airtight Containers: Use airtight containers or bags to prevent moisture and pest entry.
- Temperature Control: Maintain a storage temperature of around 10-15°C (50-59°F) to ensure seed longevity.
-
Quality Control
- Regular Inspections: Regularly inspect the stored seeds for any signs of mold, pests, or spoilage.
- Germination Tests: Conduct germination tests on a sample batch to ensure the seeds remain viable for planting.
-
Safety and Compliance
- Regulations: Ensure compliance with local regulations regarding hemp cultivation and seed harvesting.
- Personal Protective Equipment (PPE): Use appropriate PPE during harvesting and processing to ensure worker safety.
By following these steps, you can efficiently harvest high-quality hemp seeds, ensuring maximum yield and preserving the seeds' viability for future planting or processing.

Cleaning and Dehulling Hemp Seeds
Before the seeds can be turned into milk, they must be cleaned and dehulled:
- Cleaning: The seeds are cleaned to remove any dirt, debris, and unwanted plant material.
- Dehulling: The outer shells of the seeds are removed to obtain the nutritious inner kernels, also known as hemp hearts.
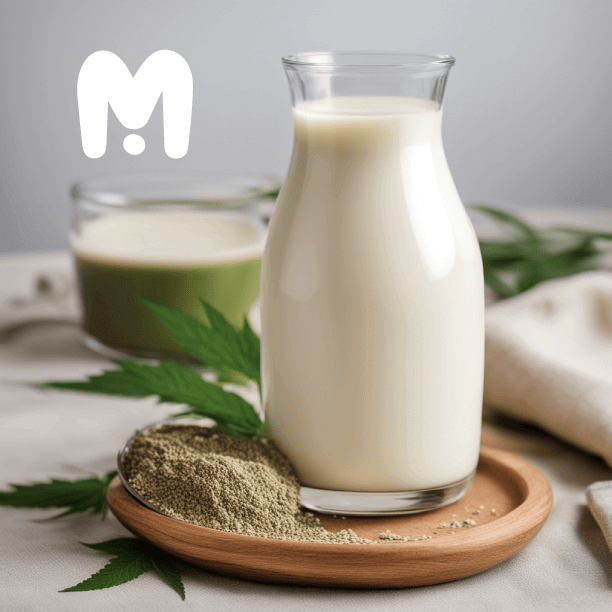
Blending Hemp Seeds into Milk
The cleaned and dehulled hemp seeds are then processed into milk:
- Blending Process: The hemp hearts are blended with water at high speeds to create a smooth, creamy liquid.
- Straining: The mixture is strained to remove any remaining solid particles, resulting in a smooth milk-like consistency.
Fortification and Flavoring
To enhance the nutritional profile and taste of hemp milk, fortification and flavoring are often added:
- Fortification: Vitamins and minerals like calcium, vitamin D, and vitamin B12 are added to boost the nutritional value.
- Flavoring: Natural flavors, such as vanilla or chocolate, and sweeteners can be added to cater to different taste preferences.
Pasteurization and Homogenization
To ensure safety and consistency, the hemp milk undergoes pasteurization and homogenization:
- Pasteurization: The milk is heated to a specific temperature to kill any harmful bacteria and extend shelf life.
- Homogenization: The milk is processed to break down fat molecules, ensuring a uniform texture and preventing separation.
Packaging and Labeling
Once processed, the hemp milk is ready for packaging:
- Packaging Materials: The milk is typically packaged in recyclable cartons or bottles.
- Labeling: Labels are applied to provide information on ingredients, nutritional content, and expiration dates.
Quality Control and Testing
Quality control is essential to ensure that the hemp milk meets safety and quality standards:
- Testing for Contaminants: The milk is tested for contaminants such as pesticides, heavy metals, and microbes.
- Nutritional Testing: Regular testing ensures that the nutritional content matches what is stated on the label.
- Taste Testing: Sensory evaluations are conducted to maintain consistent taste and texture.
Sustainability in Hemp Milk Production
Hemp milk production is known for its sustainability:
- Low Environmental Impact: Hemp plants require less water and fewer pesticides compared to other crops.
- Soil Health: Hemp improves soil health by adding nutrients and reducing the need for crop rotation.
- Biodegradable Byproducts: Byproducts from hemp milk production, such as seed hulls, can be used as animal feed or composted.
FAQs About Hemp Milk Production
Yes, hemp milk is safe to drink. It contains only trace amounts of THC and is tested to ensure it meets safety standards.
-
Does hemp milk contain any allergens?
Hemp milk is free from common allergens like dairy, soy, and nuts, making it a suitable option for many people with allergies.
-
How long does hemp milk last?
Unopened hemp milk can last for several months when stored properly. Once opened, it should be consumed within 7-10 days.
-
Can I make hemp milk at home?
Yes, you can make hemp milk at home by blending hemp hearts with water and straining the mixture. However, homemade hemp milk may not be as fortified as store-bought versions.
-
What are the nutritional benefits of hemp milk?
Hemp milk is rich in omega-3 and omega-6 fatty acids, protein, and various vitamins and minerals. It’s also low in calories and contains no cholesterol.
Final Thoughts
The production of hemp milk is a complex yet fascinating process that starts with the careful cultivation of hemp seeds and ends with a nutritious, versatile milk alternative. Understanding this journey from seed to shelf can help you appreciate the effort that goes into producing each carton of hemp milk and the benefits it offers. Whether you enjoy it in your morning coffee, smoothies, or cooking, hemp milk is a valuable addition to a healthy diet